A finished door can make the work look effortless. The choices that help it live in a room begin much earlier: the lumber, the fit, the surface, and the conditions it will face.
Tenon and mortises laid out for fitting in Chuck's shop
20+years in the trade
A craft carried forward
Learned by doing. Refined by doing more.
Chuck Jones began learning woodworking with Peter Gould in Santa Fe. More than two decades later, the archive holds earlier print photographs of finished work alongside recent records from the shop. Together they trace a working life spent building, fitting, carving, and learning from the next piece.
From first cuts to finished work
See the work take shape.
These groups follow the work across the shop, from early carving and fitting to completed doors and furniture. The floral studies and assembly views below belong to the same single Spanish-cedar door.
01 · Bradford doors
Carving at an extraordinary scale.
Each mesquite door is 3 feet wide, 8 feet tall, and 3 inches thick. The shop photographs bring the pair and their carved-panel details close enough to see the handwork; the finished entry appears in the work gallery.
One door in the shopThe pair togetherCarved panel detailAnother view of the handwork
02 · Spanish-cedar floral door
A flower takes shape in wood.
The first cuts establish the form; deeper relief and finer lines give the petals and leaves definition. The later shop photographs show the carving fitted into this single arched Spanish-cedar door. See the completed piece in the work gallery.
First cuts and layoutRelief and detailPanel in the door frameDoor in the workshop
03 · The same floral door
Eight panels come together.
The carved panels give this single arched door a repeating rhythm. Here the Spanish-cedar door is under clamps in the shop, then standing outside with Chuck and Trey before installation.
Under clampsChuck and Trey with the door
04 · Black-walnut table
One table, seen in two settings.
The shop view makes the table's broad top and sturdy base easy to see. In the room, its natural edge and proportions become part of the space. Both photographs show the same black-walnut piece.
In the shopThe complete table in the room
Real records from the shop
The work behind the finished piece.
These photographs come from different jobs. They show how material is chosen, parts are fitted, and details are shaped before a door or table is ready for its place.
01 · Material
Start with the wood.
This available live-edge red-oak slab measures 13½ feet long and 4 feet wide. Chuck expects it to finish at about 2¼ inches thick. It is available alongside other Lightning to Legacy slabs for a future project.
02 · Fit and assembly
Make the parts belong together.
This framed piece is held in alignment while it is assembled. The photograph doesn't show the joint itself, but it shows a stage that happens before any finish can make the work look complete.
03 · Handwork
Let the tool leave its mark.
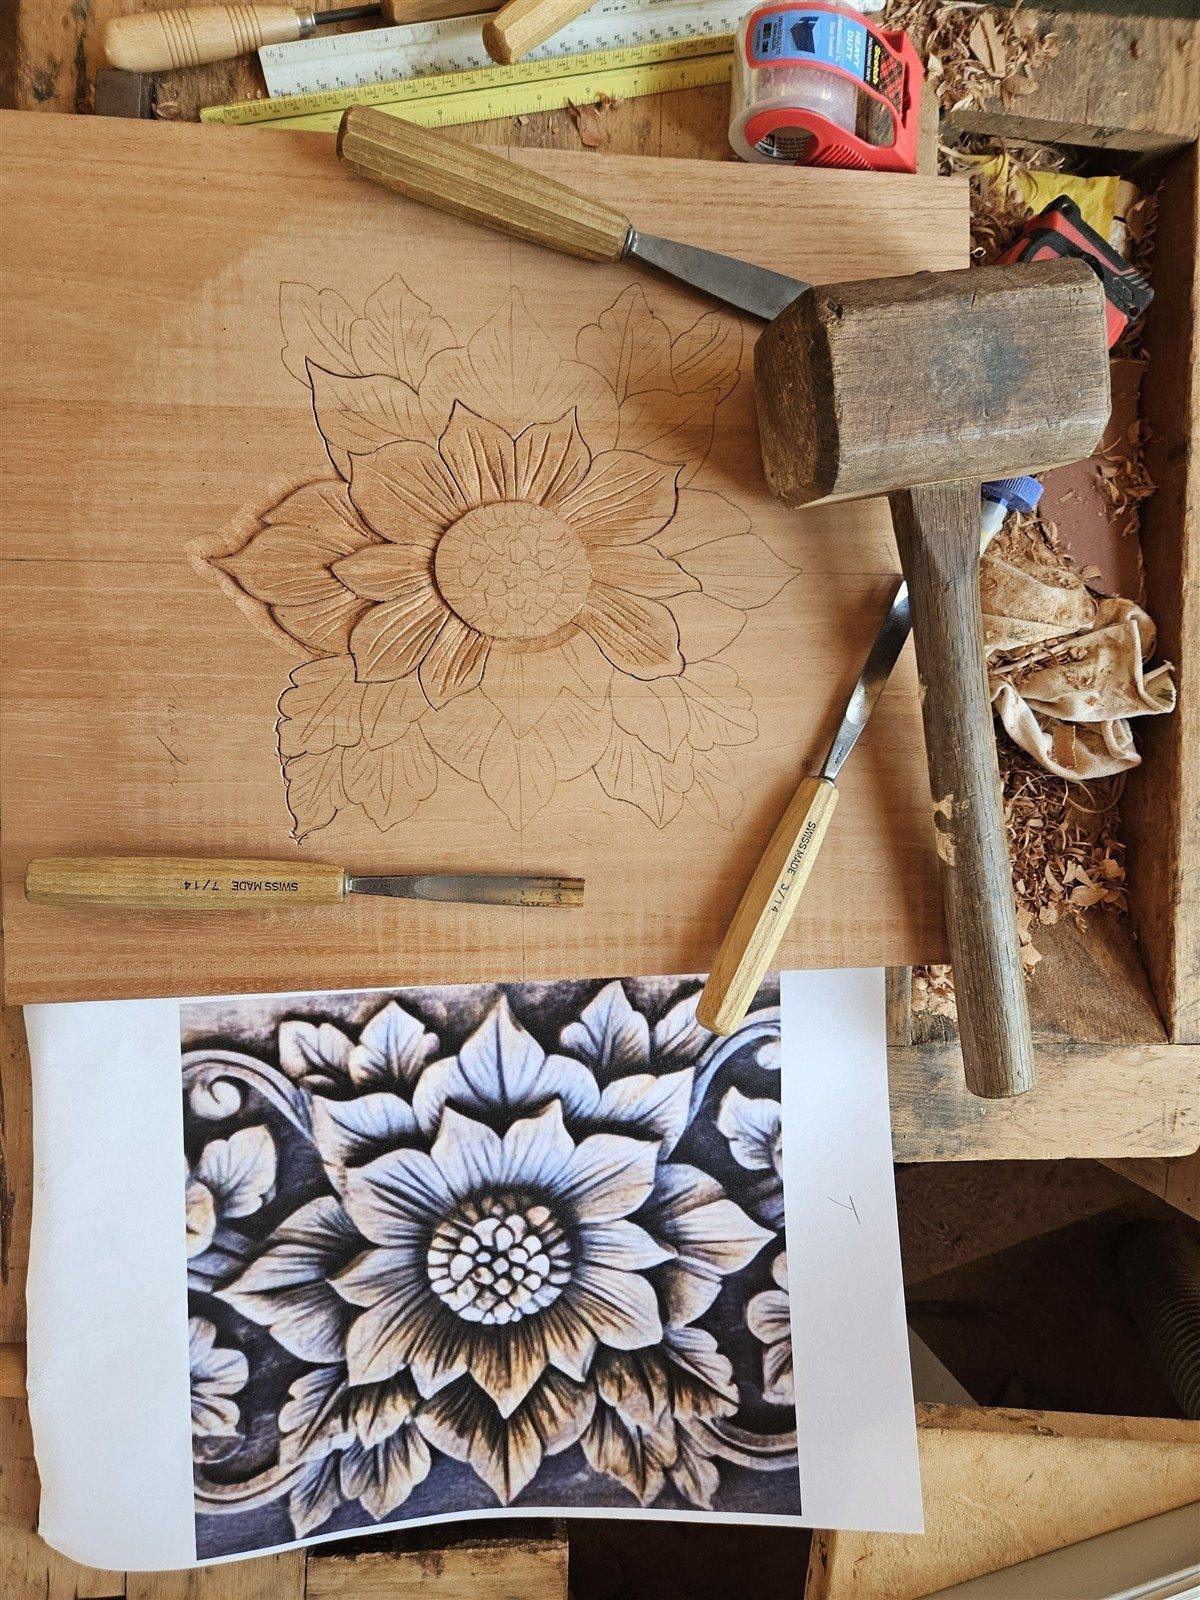
The drawing, chisels, mallet, and partly cut flower share one bench. Chuck's carving keeps the evidence of the hand rather than sanding it into a machine-made surface.
04 · Surface
Read the grain again.
As a surface develops, its grain and edges become clearer. The finish is a later decision, made with the material and the piece's future setting in mind.
05 · Carved detail
Depth made by hand.
Three floral forms rise from this shop panel. Their varied depth catches the light and gives the surface its texture.
Useful things to know
Why the choices beneath the surface matter.
01
Solid wood moves.
As moisture changes, solid wood can expand or contract. A door or table has to be designed for the environment where it will live, not just for the day it leaves the shop.
02
Joinery carries the load.
Chuck uses traditional mortise-and-tenon joinery. It takes careful milling and fitting before the parts become a stable whole; finish cannot replace that work.
03
Species is more than color.
Grain, character, and suitability differ from one wood to another. The choice should start with where the piece will live, how it will be used, and the appearance you hope for.
04
Care depends on the setting.
An exterior entry and an indoor table meet different conditions. The right finish and maintenance conversation depends on the material, exposure, and intended use.